


Hello my crafty friends! Emilie here with a Sn@p! Album design using the gorgeous TRAIL MIX collection alongside the limited-edition LIME SN@P BINDER.

This collection marries so well with this color of album and it made creating the cover a real breeze.

When I create an album, my first process is always to decide in advance the number of pages I want, the type of pages I want to use and the pattern in which each type of page repeats.
For this particular album, I decided to use a repeat of three types of pages: One page protector with three pockets, one note page where we could write lots of memories and one page protector with one large 6x8 pocket. I repeated this pattern until I had covered all the subjects, I knew I would want to talk about: friends made, games played, things learned, sights seen and highlights.

Once the breakdown of my pages had been decided, I went on to decorate my cover. I always do this first as it always set the scene for the inside of my album and it gets my creative juices flowing.

For this album cover in particular, I created a shaker with one of the photo frames. It adds lots of detail and some fun to the start of my album.

I then went on the create a pocket to the inside part of my album. I left it empty as I know this is where a lot of flyers, maps and any souvenirs picked up along the way would go.

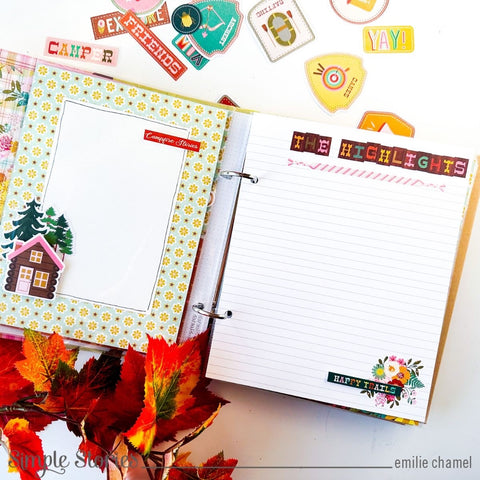
Now it’s time for the actual pages. I always start by filling up all the pockets deciding where each 3x4, 6x4 and 6x8 cut-apart would go. Once this is in place, I go on to decorate each card individually, placing a piece of white cardstock where the future photos will go. I like to do this as this allows me to gift some of the albums to friends and family, making sure they know where to place their cherished photographs.

For this particular album, I knew I wanted to make the most out of the note pages that come with the SN@P! BINDERS. These binders come already full of dividers, pages and page protectors.

I decorated the note sheets with a few stickers, creating a title for each sheet. I love the idea of being prompted with what to talk about on each page!

And this is how my album came together. I find that pre-planning my pages helps me feel a lot less overwhelmed with how to fill such a big album and makes the job a lot easier!
I had so much fun creating this album and I hope that you felt inspired! Make sure to grab your TRAIL MIX collection at your local scrapbooking store!
Lots of love,


0 comments