Hello everybody! How are you today? I hope you are doing great. Do you have favorite recipes? Would you like to have a very special mini book for them? Let’s create one! I’m Celes from GuiadeManualidades.com and today we are going to create together. All of us have favorite recipes, but sometimes we forget them.
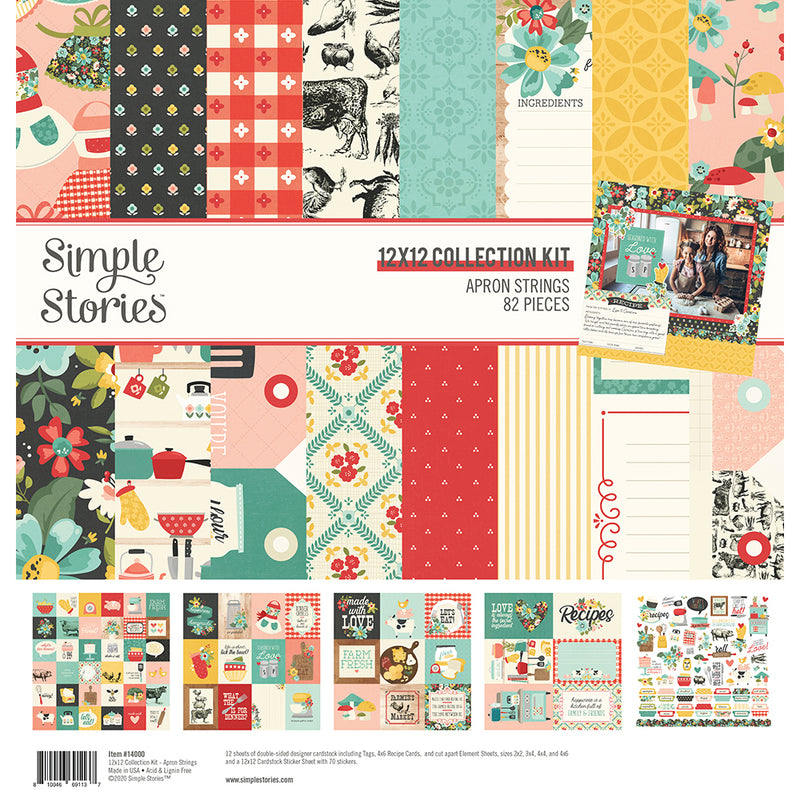
Using the Apron Strings Collection we are going to make a mini book for all the recipes.. And, besides, we are going to leave extra space for new recipes. Let’s get started!
Using the Apron Strings Collection we are going to make a mini book for all the recipes.. And, besides, we are going to leave extra space for new recipes. Let’s get started!

First thing to do is define the design for the cover. You can find a lot of inspiration in this collection. I chose to make a cover with a mixer so I looked for a cutting file on the internet. But, you can make any design you like.
For the structure of the album we need 3 pieces of cardboard of: 1- 7 1/2” w x 9” h (two pieces), 2- 2” w x 9” h (one piece). To cover all of them I used two design papers from the collection kit.
Besides, I made a basic spine. For making it cut a piece of textured cardstock paper of 10 1/4” w x 8 1/2” h. Then you have to scored it in 1 ½”, 2”, 2 ½”, 2 3/4”, 3 ¼”, 3 3/4”, 4”, 4 1/2”, 5”, 5 1/4”, 5 3/4”, 6 1/4”, 6 1/2”, 7”, 7 1/2”, 7 3/4”, 8 1/4”, 8 3/4”. As a result you are going to have a classic spine with 6 hinges. As a result you are going to have a classic spine with 6 hinges. And let's cut them in half. As a result, you will need to make 12 pocket pages.
To decorate the spine, cut 7 strips of design paper of 1/8” w x 10” h. Then, you can sew them with zig zag stitch (use a sewing machine)
Glue all pieces together to make the mini album structure. After this, you can glue the spine in place and remember to add the ribbon.

For the cover:
I love this cover! As I told you, I chose a mixer design and made a shaker for the bowl. It looks so beautiful and lovely. One of the snap cards of the collection kit has a similar design. Besides, I added some die cuts and chipboards to complete the decoration. As I always tell you, remember to play with all you have ;)
I love this cover! As I told you, I chose a mixer design and made a shaker for the bowl. It looks so beautiful and lovely. One of the snap cards of the collection kit has a similar design. Besides, I added some die cuts and chipboards to complete the decoration. As I always tell you, remember to play with all you have ;)

Another detail that I made was a shaker for the outside of the spine. I cut the word "Recipes" and made a wonderful shaker. I think it is a super funny detail to make.

For the interior:
We have to make 12 pocket pages. The final size of them is 6 1/2” w x 4 1/4” h. In every pocket I put two recipe cards, but it's possible to add up to five of them. As a special detail, I added a tab from the cardstock sticker page and sewed them to the first card of the pocket.
We have to make 12 pocket pages. The final size of them is 6 1/2” w x 4 1/4” h. In every pocket I put two recipe cards, but it's possible to add up to five of them. As a special detail, I added a tab from the cardstock sticker page and sewed them to the first card of the pocket.


Choose all the papers you are going to use to decorate and prepare every page. Use all you have to decorate… die cuts, stickers, chipboards, washi tapes, stamps… And don’t forget the new adhesive brads. I decided to leave these spaces for pictures and extra notes of every recipe.


Now all our favorite recipes will be in a wonderful book! Lovely to see, amazing to use!
I hope you like it!
Have a great week!
Have a great week!


3 comments
thanks
Where did you get the kitchen converigan chart at? Would like
to be able to print some off.
Thanks, Peggy
Love your RECIPE album it is stunning.